
Creating Laser Cutting Files in Adobe Illustrator
Machine Capabilities
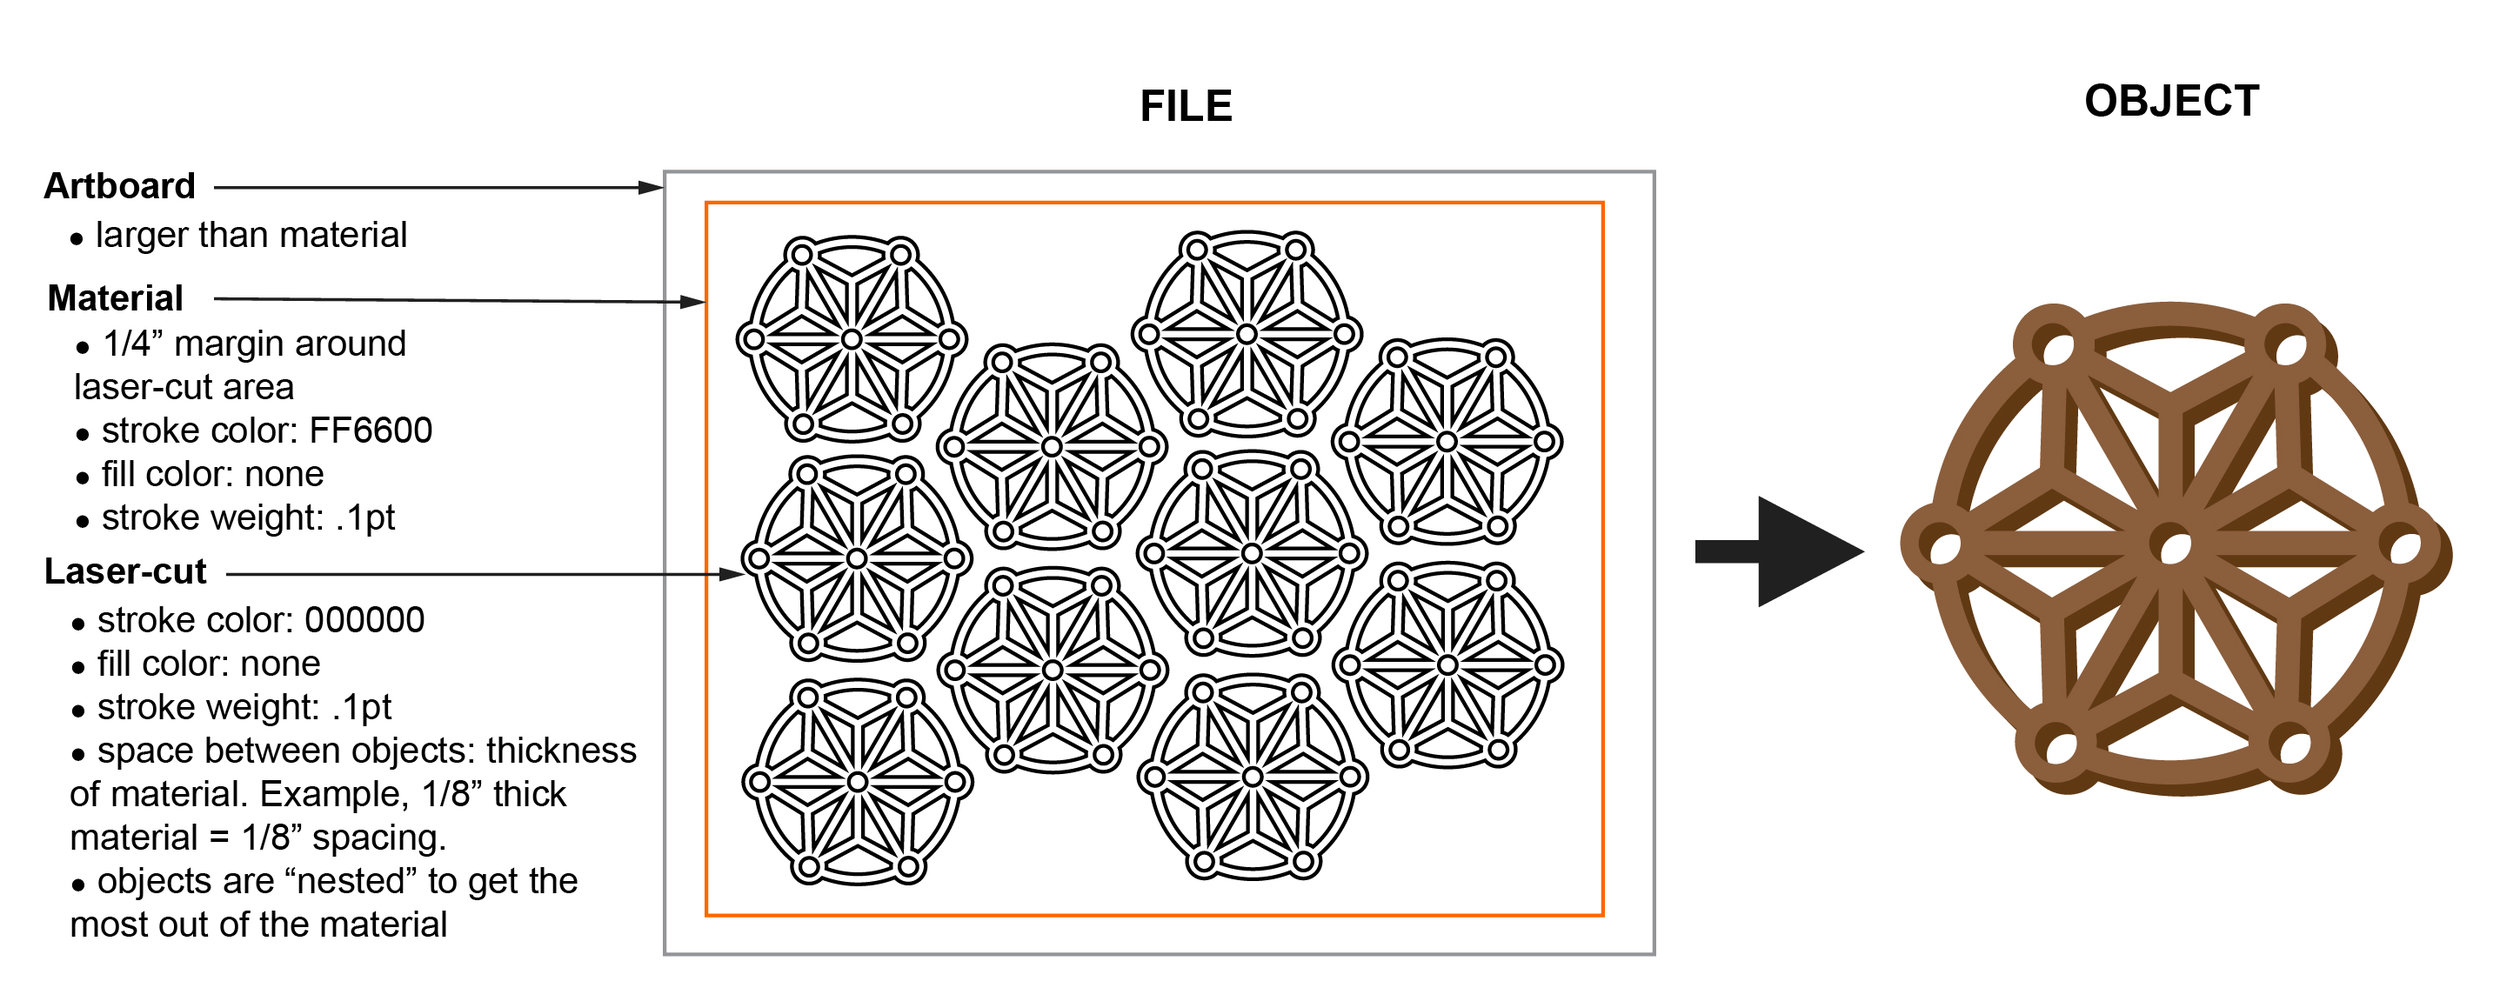
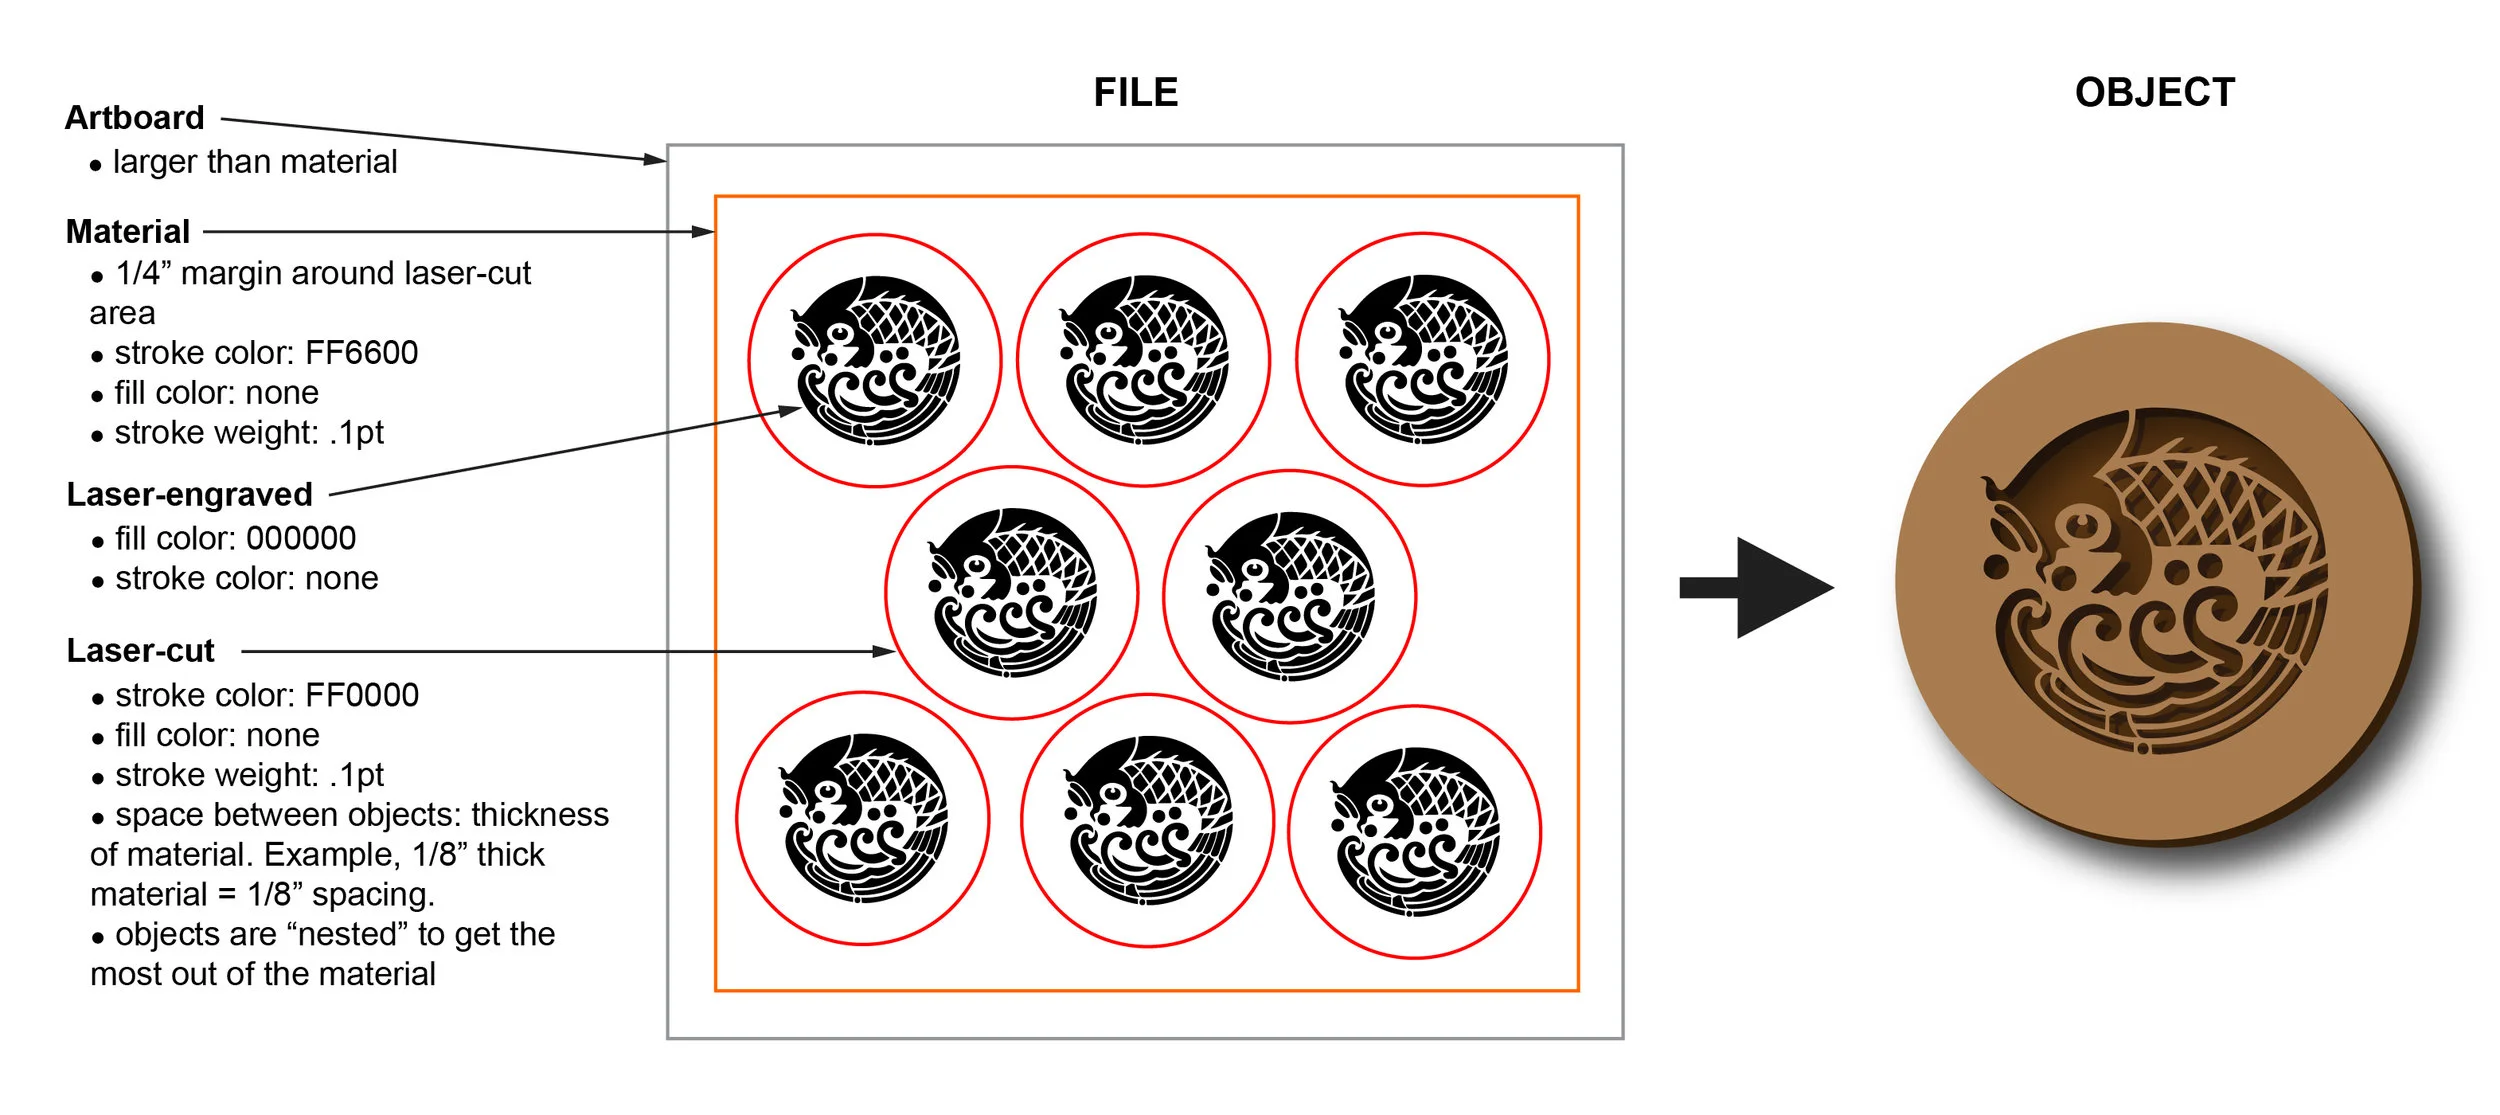
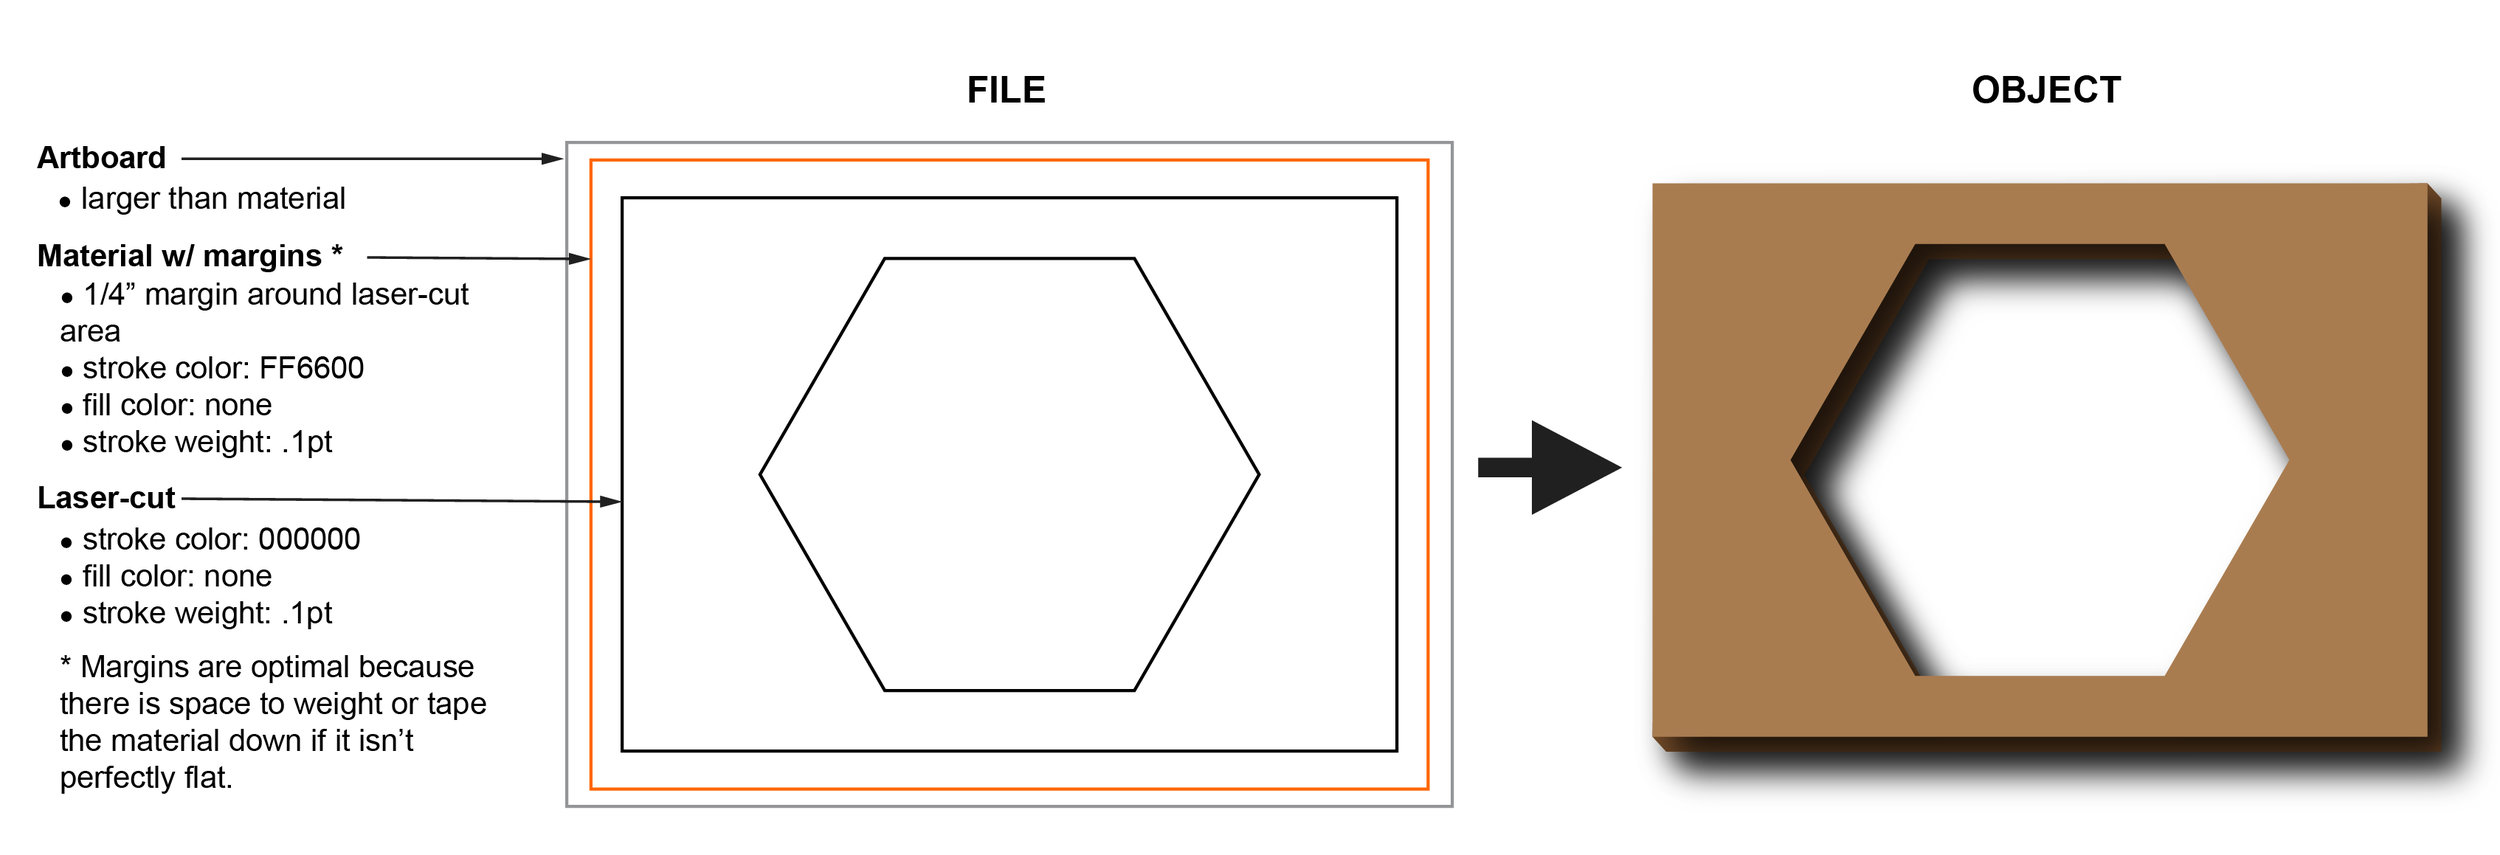
Maximum material size: 32" x 18"
Maximum image size: 31.5" x 17.5"
Maximum cutting thickness: 1/4"
Maximum material depth: 7" (engraving only)
Leave 1/4" margin between image and edge of material.
Use 1 : 1 scale. 2" x 3" image = 2" x 3" laser cut object.
File types: AI, EPS (AutoCAD), SVG, PDF
File Cheat Sheet
Color mode: RGB
Text: create outlines
NO clipping masks
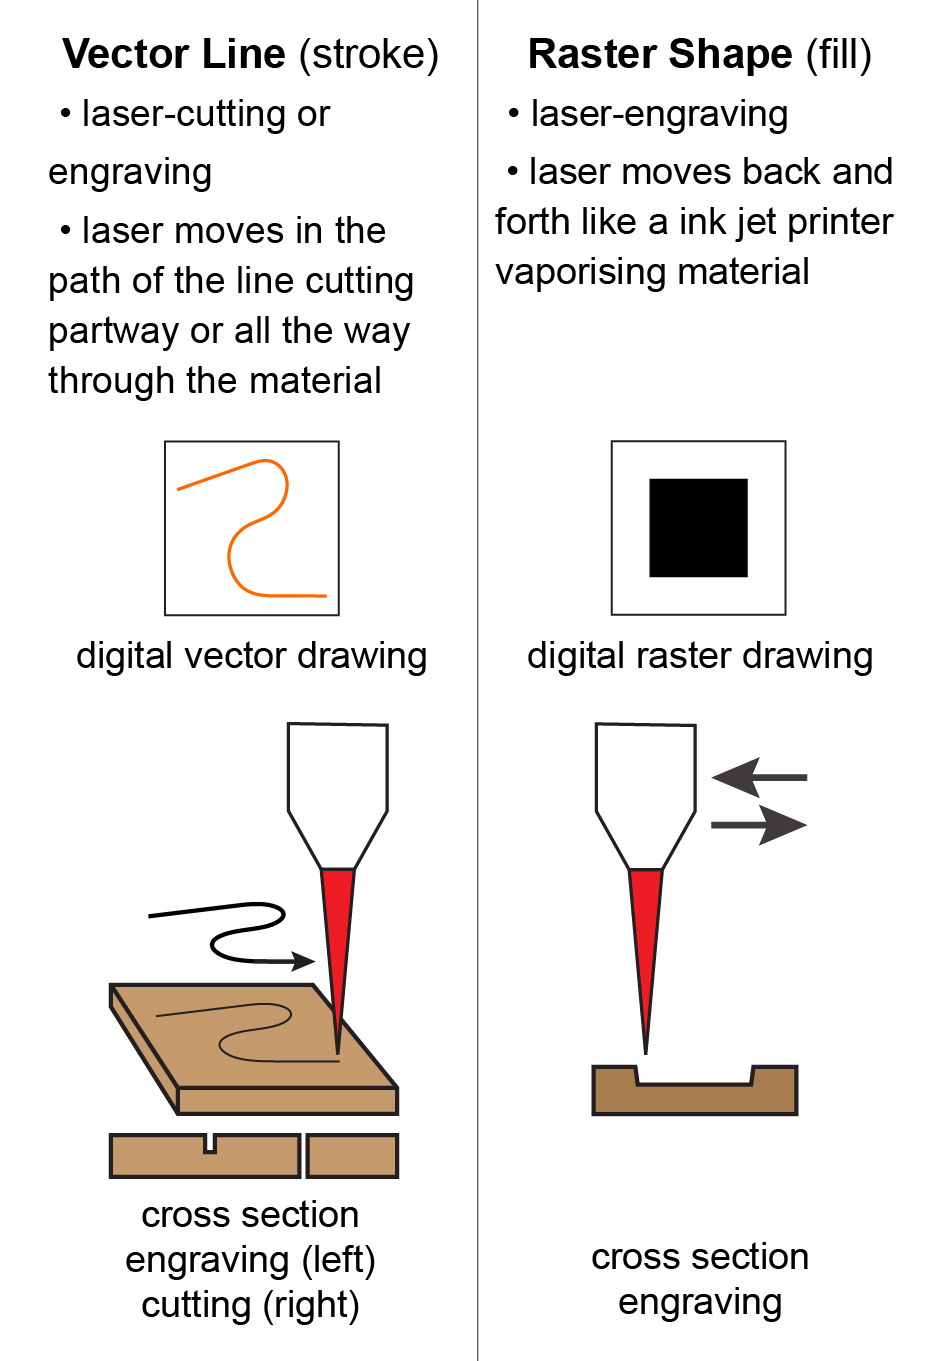
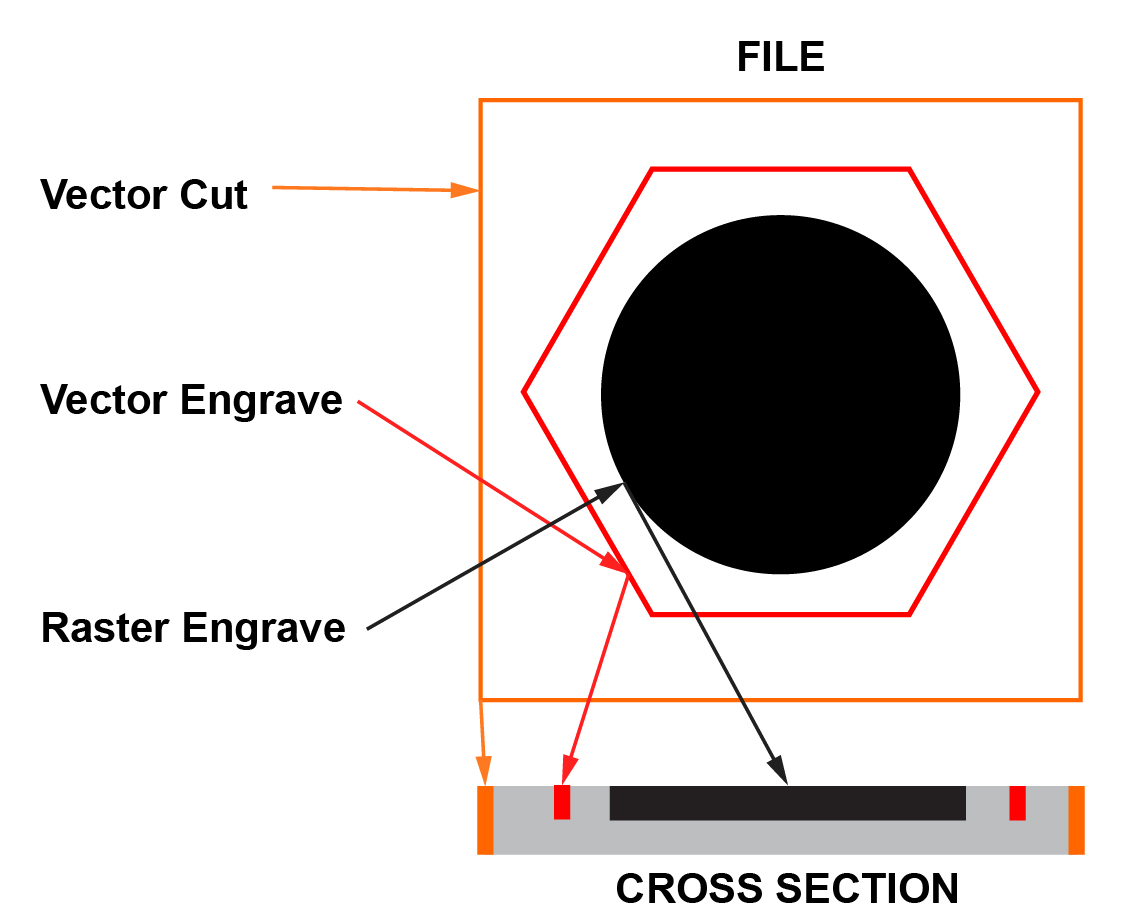
Cuts and line engraving: Fill: none. Stroke: FF6600, .1pt
Area engraving: Fill: 000000. Stroke: none
Ungroup all items: Select All > Object > Ungroup. Repeat if there are groups within groups.
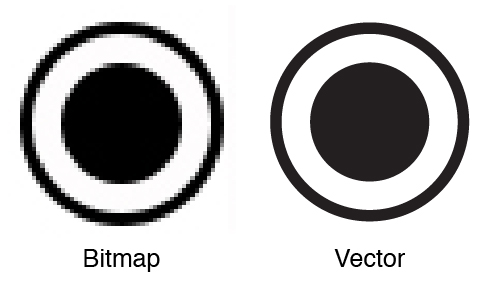
What is a Vector?
There are two types of graphic files: vectors and bitmaps/raters (.jpeg, .tiff, .gif, and .pds)
Vectors can be infinitely scaled without loosing resolution.
Bitmaps loose resolution when scaled up. Laser cutters cannot read bitmap files.
Step 1: Create New Document
File > New > Document
Size: .5" larger than material or image, not to exceed 18" x 32"
Color Mode: RGB. (laser cutter cannot read CMYK documents)
IMPORTANT: Is your Document Color Mode RGB?

Step 2: Create Image
Laser-cut and engraved images are made of vectors (lines/strokes) and rasters (fills).
Set stroke weight to .1 pt
Contact me for further instructions if you are embedding image files (.jpeg or .tiff) into Illustrator.
Step 3: Color-Code Image
IMPORTANT: Is your Document Color Mode RGB?
Color-coding allows the laser cutter to distinguish between different types of cuts.
Universal laser cutters use eight RGB colors: 00000 (black), ff0000 (red), 00ff00 (green), ffff00 (yellow), 0000ff (blue), ff00ff (magenta), 00ffff (cyan), ff6600 (orange).
Contact me for color-coding instructions that are specific to your project.
Text

To preserve your font convert "editable text" to "outlines".
Duplicate Artboard. Label one "Editable Text" and the other "Outlines".
Select the text on Artboard: Outlines then click Type > Create > Outlines.
Create "bridges" for cut out text or images.
Step 4: Before you send
Double check color-coding
Double check stroke weight, .1 pt
Ungroup all items: Select All > Object > Ungroup. Repeat if there are groups within groups.
Release clipping masks: Select All > Object > Clipping Mask > Release
Save "Name_DescriptiveTitle_Material". Example: SarahPike_FrontCover_Wood.ai
Not quite sure what your file should look like?
Look at the examples below.
Feeling overwhelmed? I can make your laser-ready files.
Multiple Laser-Cut Objects
Laser-Cut and Engraved Object
Single Laser-Cut Object With Margins
Single Laser-Cut Object Without Margins

Laser-Engraved Woodblock

Cost Saving Tips
Thin materials cut faster than thick.
Straight lines cut faster than curved.
Vector lines cut/engrave faster than raster engraving.

Remove double lines to prevent laser from cutting twice. This saves time and potential damage to the material.

Reduce Anchor Points
Object > Path > Simplify
Adjust Curve Precision slider to remove anchor points without distorting the image.

Connect Vector Paths (for cutout shapes)
Select the end points
Object > Path > Join