Improving your workflow with Artboards in Adobe Illustrator
How do you create laser cutting files with efficiency and flexibility?

Harness the power of Artboards. In Adobe Illustrator, Artboards are pages within a single document. In other vector programs like Inkscape and CorelDRAW they are called Pages.
When we use multiple Artboards to organize each step of the design process from initial drawing to final pieces ready to cut out, we have the flexibility to step back and make adjustments without having to restart from scratch. Like Hansel and Gretel we are leaving bread crumbs our future selves will thank us for.
Let’s see what this looks like in practice with this Luna moth air plant holder (right).
Artboard 1: Original Drawing
Here we have the original drawing (right), which is more of a sketch. It includes a center line that will be deleted from the final piece, two size versions for the antenna, and separate elements for the markings that will be combined into unified shapes in the next step. It's a start but it's not laser-ready.

Artboard 2: Finished Moth
Next the original drawing was duplicated onto Artboard 2 and cleaned up (left). Here it is with each piece colored in, to illustrate that the original drawing, which was made up of lines, has been turned into shapes. These shapes will eventually be cut out as individual pieces of dyed wood veneer.
Side note: The process for making this piece is very similar to one of the projects you can learn to make in my online course, Start Laser Cutting with Confidence. Learn more, here.
Artboard 3: Plant Holder
The third Artboard is where the design of the air plant holder comes together (right). It contains all the individual elements of the design, and the moth has been scaled down and rotated in relation to the stand.

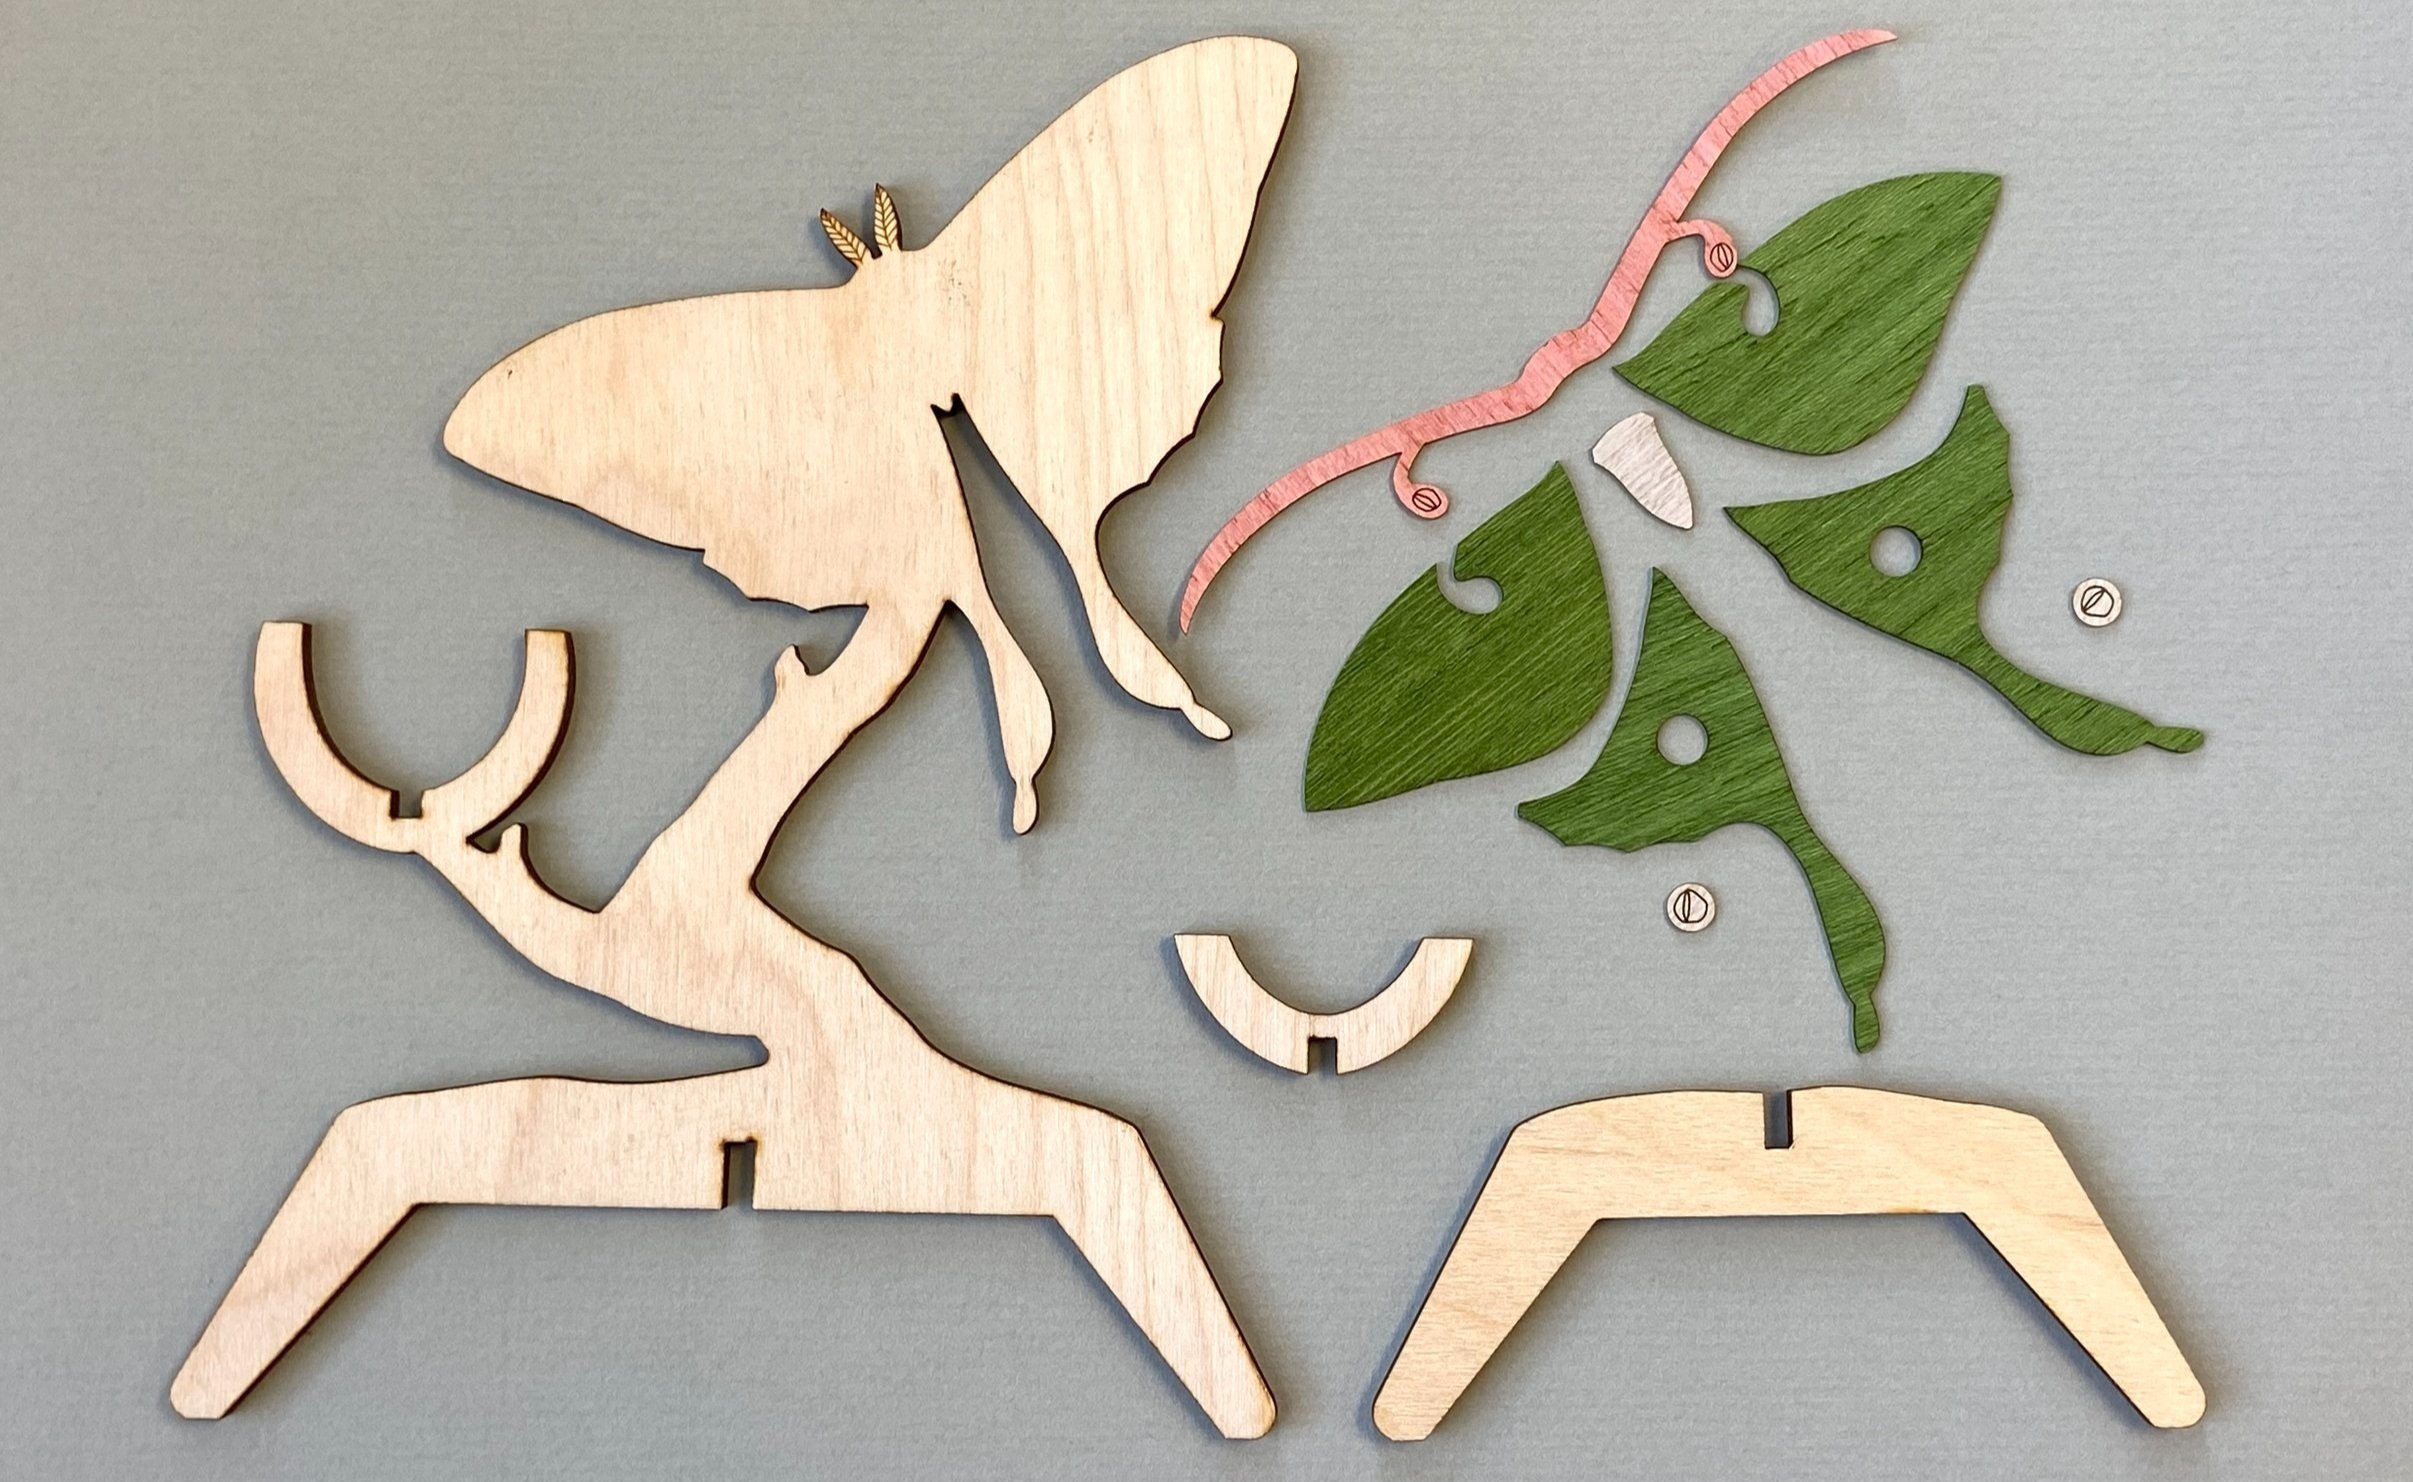
Artboard 4: Ready to Cut
On this last Artboard (right), I’ve separated out the pieces of the moth that will be cut out of dyed veneer and unified the outside shape of the moth with the stand. These pieces are ready to cut!
Keeping a copy of this step (above, left) before the pieces are joined together is super important for two reasons.
One, it gives us the flexibility to make future changes easily. For example, it’s not unusual to have to adjust the width of interlocking pieces. The width of the slots may need to be slightly increased or decreased because wood can vary in thickness.
Two, having a copy of the individual pieces gives me the option to use parts of the design for different products. Yes, you guessed it. I’ve used this base before with other air plant holders (below).


But wait! Did you catch it?
We can’t send this file to the laser cutter as is because it contains pieces that will be cut out of different types of material. For that, we need to copy and paste the pieces onto more Artboards (below, left)! One for each material (below, right).