Dancing Between Success and Failure
Dancing on the fine line between success and failure is my favorite place to be.

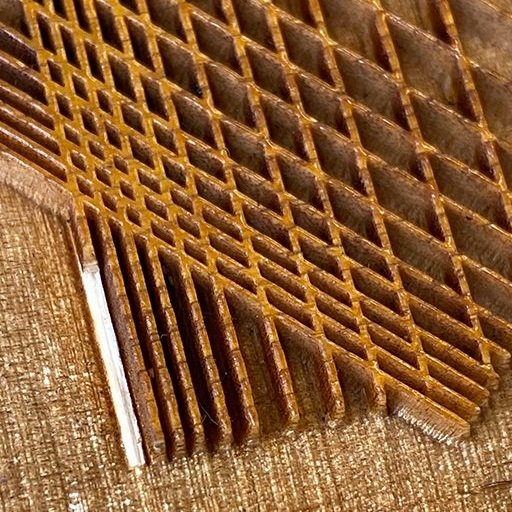
Detail of Jamie Wainright’s woodblock.
Printmaker and workshop participant Jamie Wainright came to me with a tricky project. She wanted to turn a couple of her etching prints into woodblocks (right). With this type of laser engraving, the area around the image is engraved away, leaving the image raised.
For images with fine lines, this can be a problem.
When engraving deeply, a little bit of the image is burned away on the edges. If the lines are too fine, the laser can eat them all up!
To be on the safe side, I usually recommend artists design images with lines that are at least 1/16". But the nature of an artist is to push boundaries, right? Nobody listens to me when I make this recommendation.
What to do? Make a test of course. See the results below and the steps I take to test how fine a line I can engrave before the laser eats it away or it becomes so weak it breaks off. (I said “failure,” not disaster.)

Vector file for laser engraving step test.
Step 1: Create a test file
For this test, I created a file with a variety of line widths. When creating tests, it is a good idea to test both extremes: thicknesses you know will work (1/4") to thicknesses you’re pretty sure will fail (1/64") (right).
I also wanted to test how close the space between lines could be. Would small spaces show up or eat away the line?
Notice how the image area in the file is white and the non-image area is black.
In relief printing, we want the laser to engrave away the area around the image, so the image is raised and can be inked up.

Laser engraved wood test
Step 2: Laser Engrave
When conducting tests, it is important that you test the exact material you are using for the finished piece.
For Jamie’s blocks, we were using 1/4" Shina plywood with one coat of shellac varnish. This is important! The results for a varnished piece of wood will be different than raw. Even adding a second coat of varnish will alter the results. Laser cutters are very sensitive to minute differences in surface treatment and density.
Results will also vary depending on the laser cutter settings. A strong setting that engraves away 2mm will eat away more of the image than a slightly weaker setting that engraves away only 1mm.
Keep good records! Label the back of the test with material type and settings.
Step 3: Analyze
To be honest, I was surprised at the results.
1/64" thick lines were not completely eaten away. Hmmm. Just goes to show me the value of that success/failure dance.
They did become weak and could be snapped off (right). Cross-hatching helped to create stability, and the clarity of the tiny spaces between the lines was exceptional.
Final Thoughts
When engraving a 2mm depth
1/16" thick lines are safest.
1/32" lines are possible but weak and need to be handled with care.
1/64" lines are dicey.
When engraving a 1mm depth
1/32" thick lines are doable.
1/64" thick are possible but weak and need to be handled with care.
Jamie Wainright's woodblock (right)
It’s important to remember that results will vary depending on the type of wood you use and whether it is raw or varnished. Do your own tests and discover what works for your material and laser cutter. Tests are fun!

Laser engraved woodblock by Jamie Wainright