Wood Intaglio

Amze Emmons, wood intaglio proof
Amze Emmons, Philadelphia based printmaker, came to me a couple of years ago with a process I hadn't thought of: laser engraved wood intaglio plates.
Why make wood intaglio plates?
They create prints with a line quality similar to the rich, smoky edge of a dry-point.
The wood grain gives atmospheric depth and texture that contrasts the bold engraved line.
Wood is way more affordable then copper, especially if you like to work big.
In this post, I share with you the process of making wood intaglio plates and Amze's printing tips. To see Amze’s prints in person as a part of a larger print instillation, mark your calendars for September 17, 2020 at The Print Center in Philadelphia. At a time when September feels a lifetime away, may we all find ourselves on firmer, safer ground when it arrives.

Laser engraved wood intaglio plates
Step 1: Choose the Material
I've worked with two types of wood: Baltic birch plywood and maple veneer MDF (medium-density fibreboard), but you should feel free to experiment with other kinds of wood to achieve different results.
Baltic birch plywood is affordable with a pronounced grain, which can be a pro or con depending on the effect you are looking for. If your image is a fine line drawing, the grain be overpowering.
For this project we used maple veneer MDF, which perfectly balanced the visibility of the grain without distracting from the image.
Will birch plywood from a big-box store work? I don't see why not.
Where do I buy my wood?
My favorite place to source wood is Ocooch Hardwoods, a family run business in Wisconsin whose wood always arrives flat (very important for laser cutting) and carries hard to find 1/16" and 1/8" hardwoods.
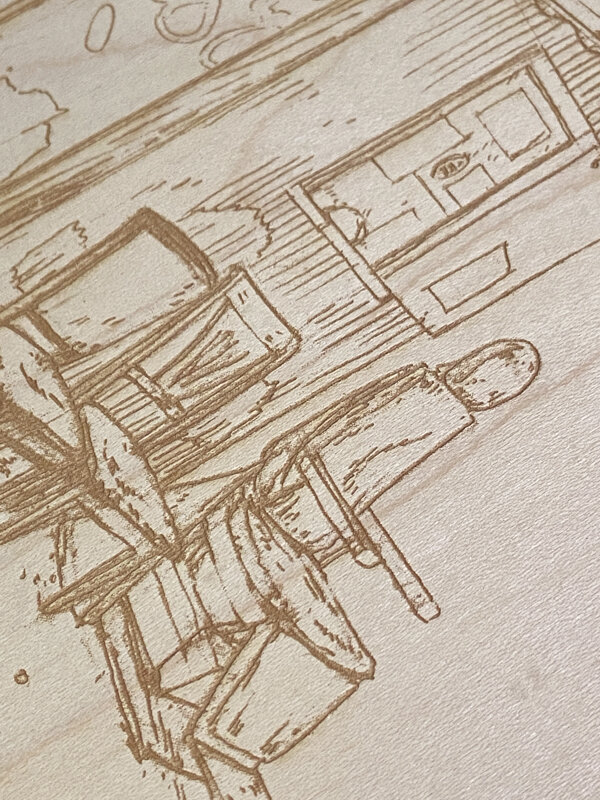
Laser engraved wood intaglio plate (detail)
Step 2: Laser Engraving
The laser engraving for wood intaglio blocks is fairly straight forward. Do a step test to find the optimal setting for your machine — deep enough to hold the ink but not too deep that the ink can't be drawn out of the plate.
One advantage to laser engraved intaglio plates is that you have more control over how much ink transfers to the paper. Depending on the depth of engraving, you can create a print with an ink layer similar to a copper intaglio all the way up to a puffy paint look.
Is it better to seal the wood before or after engraving? It depends.
Sealing the wood before engraving gives you more control over how pronounced the grain will be. This is especially helpful if you are using Baltic birch.
Most artists I work with seal the wood after engraving because it is more affordable than paying me to do it. Amze suggests giving the plates several heavy coats, sanding in between for a less pronounced grain. Just make sure not to make those coats so heavy the lines fill in.

Inked plate (detail)
Step 3: Printing
While wood intaglio plates ink up similar to metal, Amze has a couple of tips to make the process go smoother.
Modify the ink. These plates are prone to holding their "plate tone." A super tacky ink is not recommended.
Choose a solvent for cleaning that won't melt the shellac!
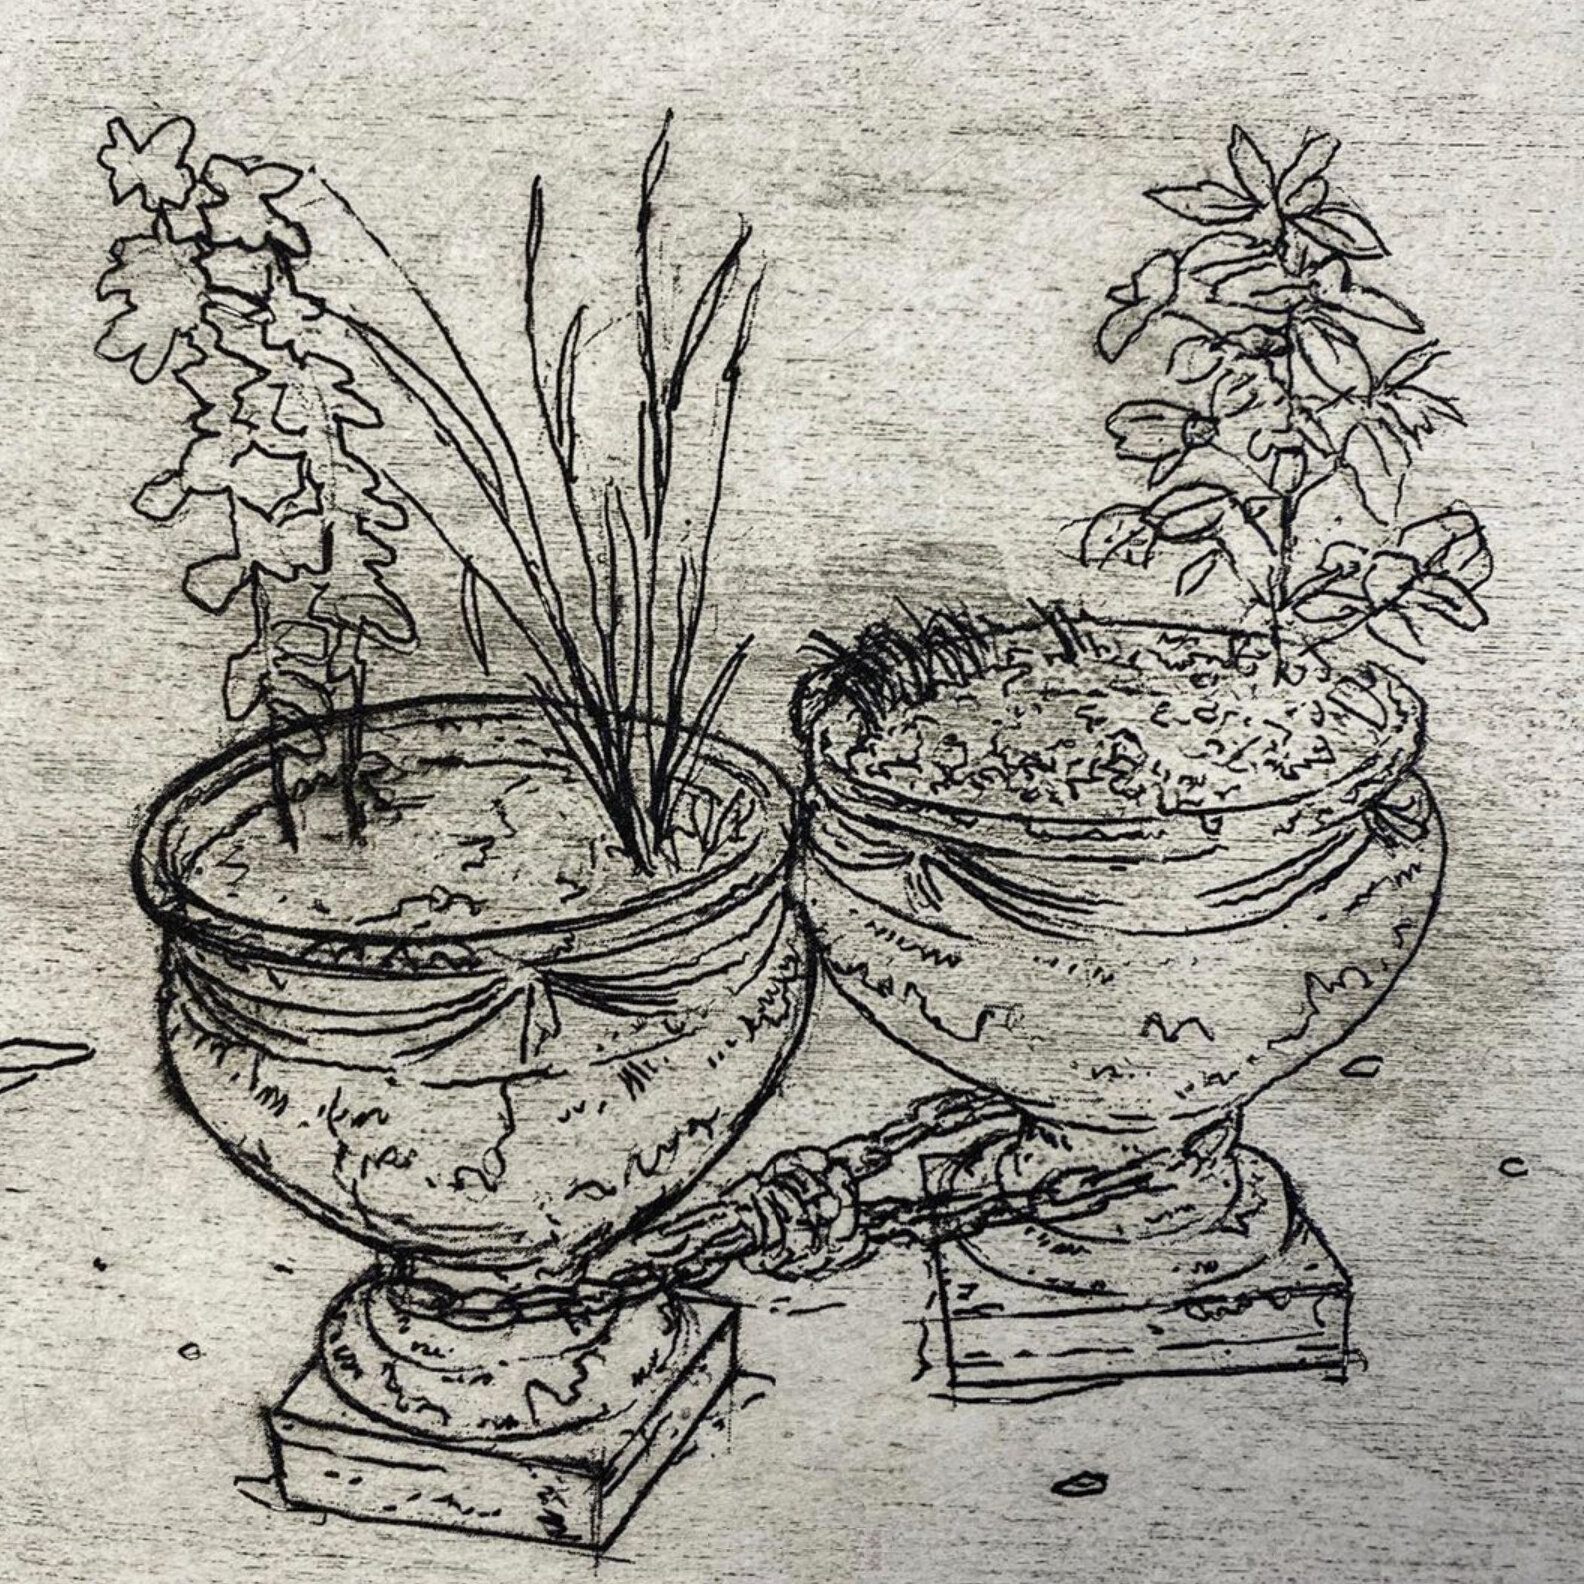
Amze Emmons, wood intaglio proof

Amze Emmons, wood intaglio proof
Feeling inspired?
Let’s chat! I’d love to hear more about your new project idea.
Fill out my Project Form.